
Zato is a Python-based, open-source integration platform that you can use to build APIs and to connect and automate systems, services and applications within an organization, no matter if they run on premises or in the cloud.
The platform is designed to be used by both experienced and new Python users, and it comes with connectors for all the most commonly used technologies and protocols, along with a scheduler and a browser-based management dashboard.
Zato is a service-oriented platform and the concept of a service is central to it, so let's clarify what a service is.
A Zato service is a piece of Python code designed to perform a specific task within an application, integration or system. Such a service is meant to be interesting, atomic and reusable. Consider it similar to a regular Python function or method but running on a server, with immediate access to functionality that lets is handle andincoming API requests, process data and to execute business logic.
Here is how a sample service will look. In this case, it used to automate some of the ports of the Keysight VisionONE network packet broker.
# -*- coding: utf-8 -*-

# Zato
from zato.server.service import Servicez

class PacketBrokerAutomation(Service):

    # Name of our automation service
    name = 'api.packet-broker.automation'

    def handle(self):

        # Obtain a connection that we previously defined in the dashboard
        conn = self.keysight.vision.Packet_Broker_API

        # A list of ports to reconfigure
        ports = ['P01', 'P02', 'P02']

        # Go through each of the ports ..
        for port in ports:

            # .. indicate which API endpoint we are invoking ..
            endpoint = '/api/ports/' + port + '/clear'

            # .. and invoke it now.
            conn.put(endpoint)

        # End of code - all ports have been reconfigured now.
Such a service can now be part of a bigger automation process, or it can be exposed through a REST API to external callers, or perhaps made to run periodically through the platform's scheduler, as in the sample here:

Comparison with automation tools
Given that network engineers already use automation in various forms, it is instructive to compare Zato with what typical automation tools do. While there is some overlap in scope, the primary difference is in the focus behind each type of software.
An automation tool will concentrate on relatively low-level, infrastructure-related operations, such as server provisioning and management of network devices through various forms of scripting, usually human-readable ones. The primary goal is to remove the need for manual, repetitive and error-prone work on potentially dozens or hundreds and more of network components.
In this way, an automation tool can ensure consistency in configuration, which is good, but we still operate within the boundaries of IT infrastructure, of making sure that the infrastructure is ready to support all the business processes that it is meant to handle.
An integration platform can do that too but its primary focus is on a higher plane of the actual business processes. A "business process" in this context has a dual meaning.
On the one hand, it means the actual core of what your company is about, e.g. core financial systems or business support applications in telecommunications.
On the other hand, it means the ability for you to connect your Zato-based automations with other applications that form a part of your own business workflow. For instance, if you need to automate network elements but also to expose APIs to CRM or billing systems, or to connect to Jira, Microsoft 365, and collect information from other places before you map it all to a common format of a message to send to yet another system, an integration platform is the correct choice.

Ultimately, the two work best in tandem, supporting each other when it makes most sense. An automation tool will provision the infrastructure for Zato, e.g. your Linux systems, their packages, or a Docker container for Zato. Then, Zato will start to integrate your systems and to support your business systems that run on top of the infrastructure that the automation tool prepared.
Architecture
A Zato environment consists of a few elements:
- One or more servers that run your integration services written in Python
- A browser-based dashboard use to configure and manage the integrations
- A scheduler that runs in background and executes your services at specific intervals or times
Zato is agentless and it is not required to install any agents on the systems that you are integrating and automating.
Typically, it is recommended that an environment runs under Docker with one server inside a container. In more advanced scenarios, when high availability is requires, more servers or more containers can be added as needed.

The usage of Docker is recommended because it lets you easily use the same container for development under Windows, as well as testing and production deployment under Linux.
In this manner, there is only one element to automate - your Zato container - and that contains inside everything that is needed to run the integrations.
Installing Docker Desktop
Since Zato usually runs under Docker, the first step to install Docker, and the easiest way to do so is to install Docker Desktop.
- Go go https://www.docker.com/products/docker-desktop/ and download the version for your operating system
- Run the installer and answer on-screen questions
- You do not need to have a Docker account to use Docker Desktop or to install Zato under it
Installing Zato
Download and install Docker Desktop for Windows
Start Docker Desktop, search for an image named zatosource/zato-4.1 and pull it to your system


- Once the image is pulled, click "play" to start a new container and fill out the settings:
- The container's name can be "zato"
- Map port 17010 to 17010
- Map port 8183 to 8183
- Add a new environment variable called "Zato_Password". Provide any value and it will become the password to your environment.


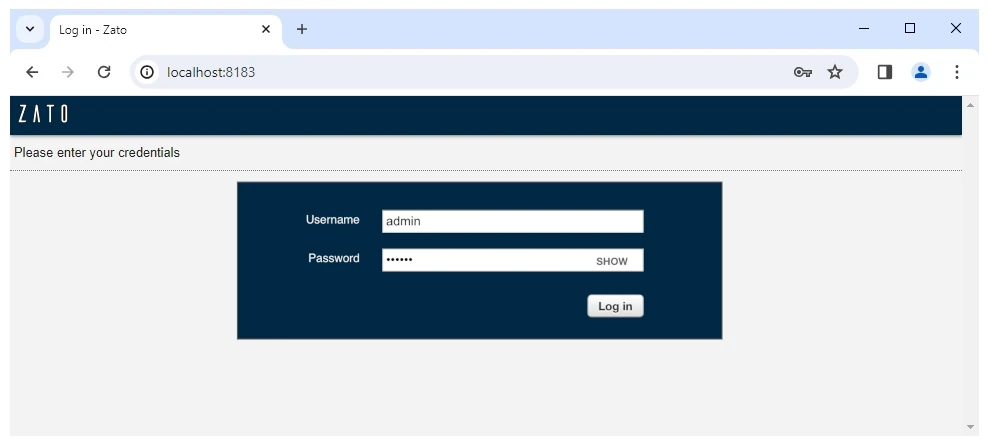
- Click "Run", wait for the container to start and log in to your Dashboard at http://localhost:8183
- Dashboard: http://localhost:8183
- Username: admin
- Password: The one that you set above
Zato Dashboard
The dashboard that you are logged into is a browser-based, centralized interface for managing various aspects of the platform.
You do not need to install any additional programs in your system to use it, the container already ships with a dashboard and you merely open it in your browser at http://localhost:8183.
It is in the dashboard that you create, configure and manage the building blocks of each integration, which in the Zato's terminology are called channels, security definitions and outgoing connections.

Channels are the means for external clients, such as other systems and applications, to invoke your services with. For instance, a REST channel will let you expose your service to other parts of your infrastructure.
The built-in scheduler is a kind of channel itself, thanks to which you can implement your integration logic once and make it accessible through multiple channels, the scheduler including. As an example, a service that cleans up user accounts in a zero-trust environment can be assigned to one or more REST channels to let other systems invoke it on demand but it can also be attached to a scheduled job so that it cleans up such accounts in background too.
Security definitions let you enforce access controls for the integrated systems and services. On the one hand, you create one when you want to secure a channel through which your services are invoked. On the other hand, when your services connect to external resources, e.g. cloud REST endpoints, you create a security definition to let the service authenticate itself.
An outgoing connection is how the services invoke various endpoints, systems or other elements of your architecture that Zato services make use of. They act like connectors hiding the complexities of connecting to a specific technology, giving you an easy way to access any external resources using Python while doing all the heavy lifting behind the scenes.
Connecting Visual Studio Code to Zato
Any code editor can be used with Zato but it is recommended to use Visual Studio Code because that makes the development process most straightforward.
After installing VS Code, click the Extensions icon, look for "Zato" and install the plugin for the platform that will let you easily deploy your code to remote servers, including ones running in a container.

When you are configuring the plugin, you will be asked for a password. Use the same password that you set for the "Zato_Password" environment variable when the container was starting.
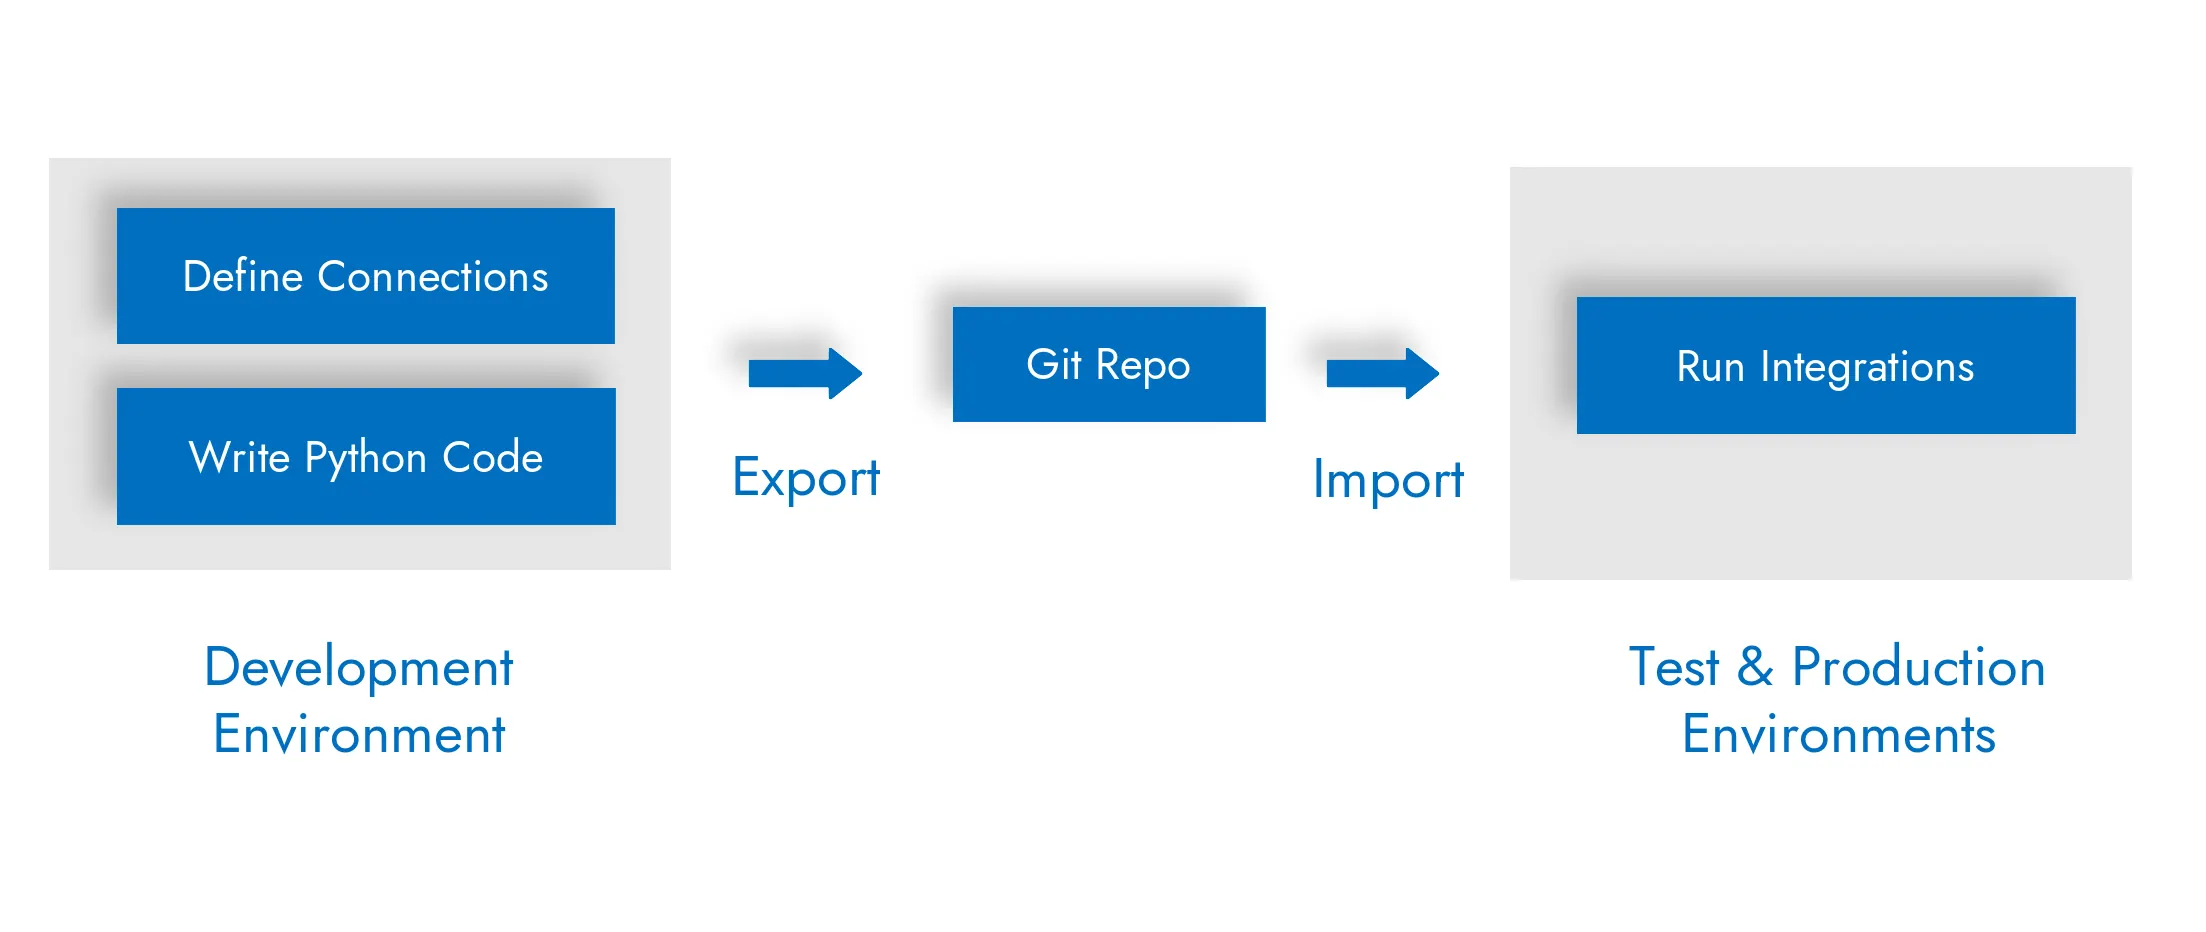
Development Process
The development process with Zato follows a pattern of a few steps:
- Define your connections in Dashboard - specify endpoints, protocols and other relevant details for each connection
- Write the integration code that uses the connections
- Once everything is developed, export your connections to YAML and store them in your git repository. This allows for seamless automation of the deployment of your connection definitions in other environments.
Let's go through a couple of examples of what automation and integrations with Zato looks like in practice. First, integrating with Office 365 and then with Atlassian Jira.
Python automation - Office 365 IMAP E-mail
Interacting with Office 365 requires that a dedicated OAuth app for Zato be created in Azure. You will need three pieces of information:
| Configuration element | Sample value |
|---|---|
| Application (client) ID | 15174974-dc45-4bb9-b5d7-7375768c9a4c |
| Directory (tenant) ID | 3531c92d-af4b-415b-894c-cde3105e0afd |
| Client secret | Fqipbzq4yKMOC3V1ceH5ILe4i3qN5uPgvhO8An0fdB |
| Email to act on behalf of | myuser@example.com |
To read and send Office 365 IMAP e-mails, make sure that the Azure app for Zato has the following Microsoft Graph permissions assigned:
- Mail.ReadWrite
- Mail.Send
Once you have the Azure app configured, go to the Zato Dashboard, click Connections → E-mail → IMAP.

Next, click "Create a new IMAP connection" and fill out the form as below, providing the details of the Zato app previously configured in Azure.

Afterwards, click "Change secret" to change it to the one prepared earlier in Azure.

Now, you can read emails as in the example below which goes through all of the messages in the mailbox pointed to by the connection that you created and prints each one to logs.
In a real integration, your Python code would do more. For instance, it could parse each email or extract attachments to insert some in an SQL database while sending the rest to a cloud-based REST endpoint.
For simplicity, though, to illustrate the point of how to connect to Azure e-mails, the code simply prints the messages.
# -*- coding: utf-8 -*-
# zato: ide-deploy=True

# Zato
from zato.server.service import Service

class MyService(Service):

    def handle(self):

        # Name of the connection to use ..
        conn_name = 'My IMAP Connection'

        # .. get the connection ..
        conn = self.email.imap.get(conn_name).conn

        # .. go through each message ..
        for msg_id, msg in conn.get():

            # .. and log it.
            self.logger.info(msg.data)
Python automation - Atlassian Jira
To integrate with Jira, you need to create an API token for a username in the Jira instance you will be connecting to, along with additional information, such as keys of Jira projects to look up your tickets in.
| Configuration element | Sample value |
|---|---|
| Address | https://example.atlassian.net |
| Username | myuser@example.com |
| API token | o3lHNN2MQkM1FE0VTCrz7qBoJWJ2Qghy0qJqQXtzi3 |
After obtaining the API token from Jira, go to the Zato Dashboard, click Vendors → Atlassian → Jira.

Next, click "Create a new connection" and fill out the form as below:

Afterwards, click "Change API token" to and provide one from Jira to complete the configuration:

Now, we can run queries in Jira and process the tickets. As in the IMAP example above, the sample code only prints the tickets to logs while real code would process each ticket accordingly.
# -*- coding: utf-8 -*-
# zato: ide-deploy=True

# Zato
from zato.server.service import Service


class MyService(Service):

    def handle(self):

        # Name of the connection to use
        conn_name = 'My Jira Connection'

        # We are going to look up tickets of that status only
        status = 'Approved'

        # Create a reference to our connection definition ..
        jira = self.cloud.jira[conn_name]

        # .. obtain a client to Jira ..
        with jira.conn.client() as client:

            # .. build a query for Jira ..
            query = f'status="{status}"'

            # .. issue the query ..
            result = client.jql(jql=query, expand='names,browse,editmeta')

            # .. log what we received from Jira ..
            self.logger.info('Jira query result -> %s', result)

        # .. we enter here only if there are any tickets to process ..
        if result and result['issues']:

            # .. go through each ticket found ..
            for ticket in result['issues']:

                # .. log details of each ticket.
                self.logger.info('Ticket ID -> %s', ticket['key'])
                self.logger.info('Ticket fields -> %s', ticket['fields'] )
Ready to break free from the limitations of traditional methods? Dive into the world of efficient integrations. Request your customized demo today.
 - John Adams