Zato installation on Docker
- You can create a quickstart Zato container under Docker Desktop or from the command line.
- There is no difference in functionality between the two. In eiher case, you install the same image.
- The screenshots below show a Mac installation. Under Windows and Linux, the installation steps are the same as on Mac.
Download and install Docker Desktop for your operating system
On Mac, if you have Apple silicon, make sure to install all the updates for your system because newest Docker versions may be incompatible with upatched macOS systems
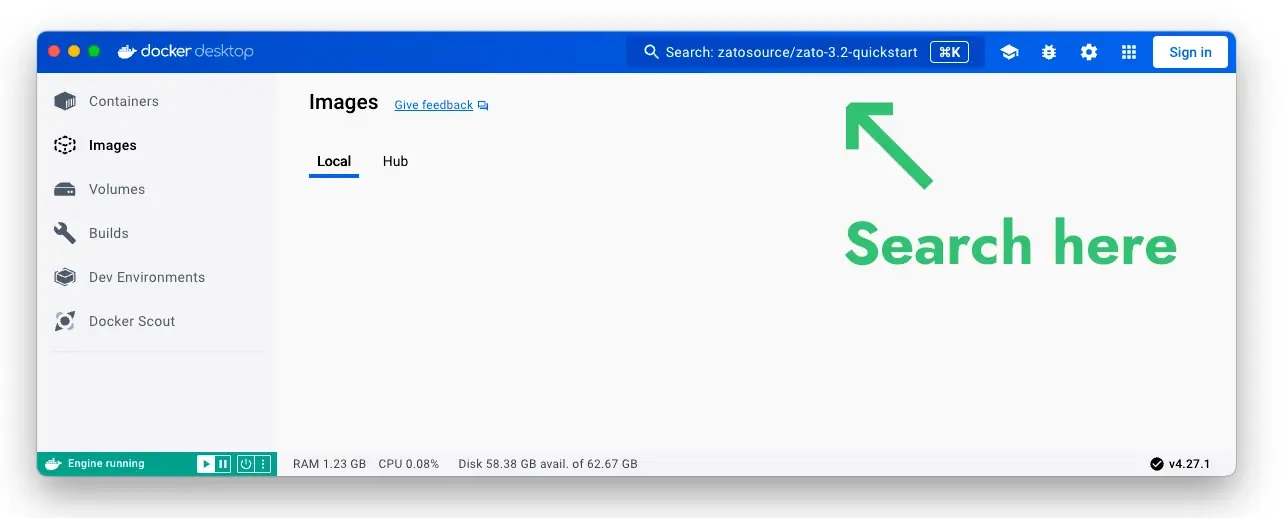
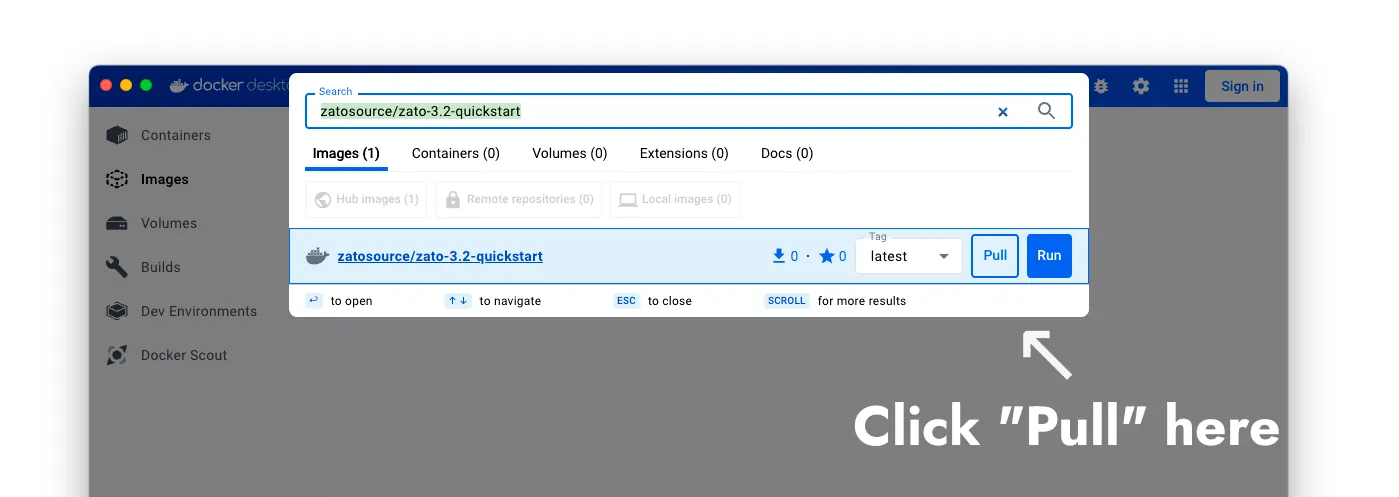
- Start Docker Desktop, look up an image called zatosource/zato-3.2-quickstart and pull it to your OS
- Once the image is pulled, click "play" to start a new container and fill out the settings:
- The container's name can be "zato"
- Map port 17010 to 17010
- Map port 8183 to 8183
- Add a new environment variable called "Zato_Password". Provide any value and it will become the password to your environment.
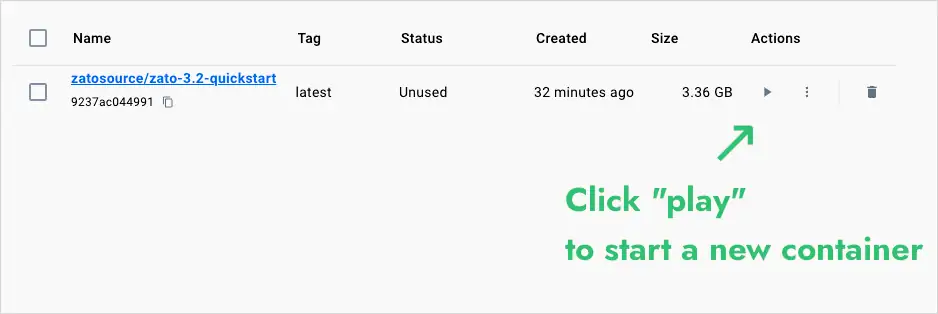
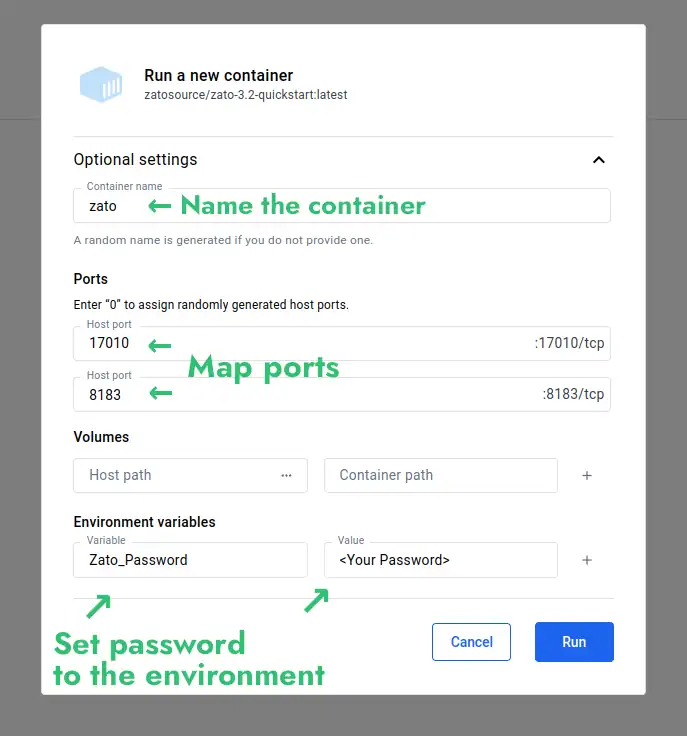
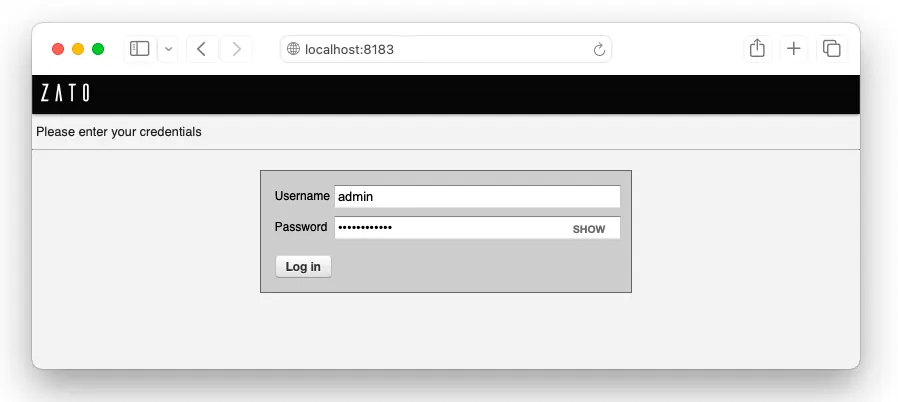
- Click "Run", wait for the container to start and log in to your Dashboard at http://localhost:8183
- Dashboard: http://localhost:8183
- Username: admin
- Password: The one that you set above
- That concludes the process - you can refer to the main documentation index now.
- Download the Zato Docker Quickstart image and create a new container.
sudo docker run --pull=always -it --rm -p 22022:22 -p 8183:8183 -p 11223:11223 -p 17010:17010 \
  --name zato-3.2-quickstart -e Zato_Log_Env_Details=True \
  ghcr.io/zatosource/zato-3.2-quickstart
- Observe the credentials printed on your screen when the container starts up - they will let you log in to your Dashboard.
- Dashboard: http://localhost:8183
- Username: admin
- Password: copy - paste it from the "zato_dashboard_admin_password" key printed on your screen
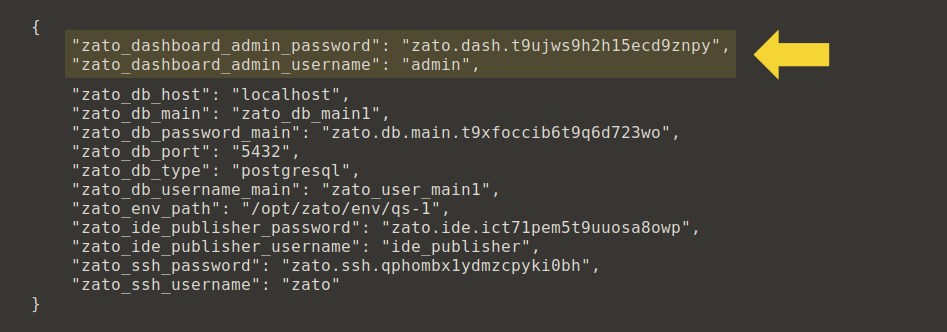
- If you do not have Docker logs open and you want to print the credentials, retrieve them by running this command from your host, which will show all the credentials on screen:
sudo docker exec zato-3.2-quickstart /bin/bash \
  -c "cat /opt/zato/env/details/all-zato-env-details.json"
{
    "zato_dashboard_admin_password": "...",
    "zato_dashboard_admin_username": "admin",
    "zato_db_host": "localhost",
    "zato_db_main": "zato_db_main1",
    "zato_db_password_main": "...",
    "zato_db_port": "5432",
    "zato_db_type": "postgresql",
    "zato_db_username_main": "zato_user_main1",
    "zato_env_path": "/opt/zato/env/qs-1",
    "zato_ide_publisher_password": "...",
    "zato_ide_publisher_username": "ide_publisher",
    "zato_ssh_password": "...",
    "zato_ssh_username": "zato"
}
- That concludes the process - you can refer to the main documentation index now.
Schedule a meaningful demo
Book a demo with an expert who will help you build meaningful systems that match your ambitions
"For me, Zato Source is the only technology partner to help with operational improvements."
 John Adams, Program Manager of Channel Enablement at Keysight