Zato Vagrant quickstart installation
Requirements
- Vagrant, any version
- VirtualBox, any version
Installation steps
- Clone the Vagrant Quickstart repository and start a VM - this will automatically create a Zato environment:
git clone https://github.com/zatosource/zato-vagrant
cd zato-vagrant
cd quickstart
vagrant up --provision
- Enter the VM and obtain credentials needed for later:
vagrant ssh
sudo su - zato
cat /opt/zato/env/details/all-zato-env-details.json
{
    "zato_dashboard_admin_password": "...",
    "zato_dashboard_admin_username": "admin",
    "zato_db_host": "localhost",
    "zato_db_main": "zato_db_main1",
    "zato_db_password_main": "...",
    "zato_db_port": "5432",
    "zato_db_type": "postgresql",
    "zato_db_username_main": "zato_user_main1",
    "zato_env_path": "/opt/zato/env/qs-1",
    "zato_ide_publisher_password": "...",
    "zato_ide_publisher_username": "ide_publisher",
    "zato_ssh_password": "...",
    "zato_ssh_username": "zato"
}
Zato servers and other components always run under user "zato" which is why sudo was used to switch to that account. Vagrant's own default user is "vagrant" which is a root-like account that can be used for administration.
All the keys pointing to passwords are highlighted in the output above and, right after the installation, the two most important elements are credentials to Dashboard and to SSH.
A Dashboard instance is running at http://localhost:8183 and you can log into it with the username of "admin" using the password from key "zato_dashboard_admin_password".
You can also connect to the VM via SSH using "vagrant ssh" or "ssh zato@localhost -p 22022". In the latter case, password is under the "zato_ssh_password" key above.
Note that each VM will have different passwords by default. Navigate to one of the sections below for information how to provide such secrets on input, using command-line options, if you would like for them to persist across restarts.
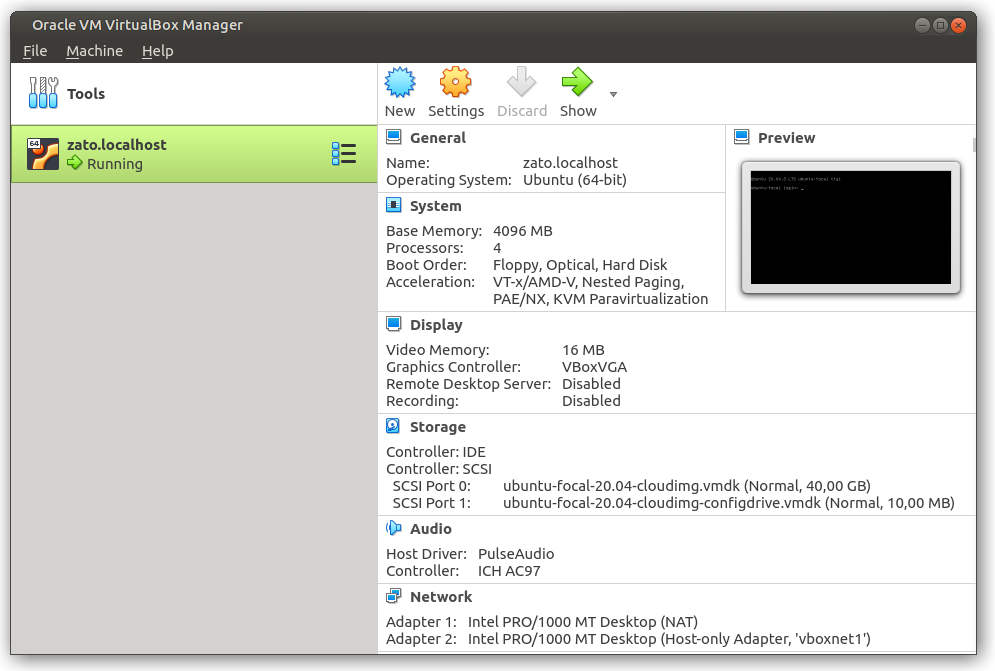
It is VirtualBox inside
A VM created using Vagrant uses VirtualBox under the hood - it means that you can use VirtualBox's own GUI tools to modify such a VM as needed.
Suspending and resuming the VM
Once the VM starts, it can be suspended using the "vagrant suspend" command. This will effectively freeze the environment in place, preserving its state and any files that are inside.
To resume it, use the "vagrant resume" command which will make the VM available once more, letting it run from the very same point when it was suspended - all the server processes will become available once more.
IDE integration
When configuring Visual Studio Code or PyCharm for work with Zato, you will be asked to provide credentials.
The username and password for your IDE to connect with will be available under keys "zato_ide_publisher_password" and "zato_ide_publisher_username" in file "/opt/zato/env/details/all-zato-env-details.json" inside the VM.
When you create a new VM, the password will be auto-generated to be different each time. However, if you merely suspend and resume a VM, the same initial password will be always used.
Configuring pip and requirements.txt
When a Zato VM starts, it will optionally install additional Python requirements and libraries using a file from the following location: /tmp/zato-user-reqs/requirements.txt. This is a standard Python file with a list of requirements for pip.
By default, the file is empty and no additional libraries will be installed but you can map a requirements.txt file from the host to the VM and they will be picked up when the VM starts.
Use the "--python-reqs" option to achieve it, as below:
Hot-deploying Zato services
Directory /opt/hot-deploy/services inside the VM can be mapped to a local one on host. Any service placed and saved inside the local directory will be automatically deployed to the server in the VM.
For instance, to map local directory /my/services, start the VM with a bind mount as below:
Now, each time any file is saved in the host's /my/services directory, it will be deployed to the server inside the VM.
Directory mounted in this why will be scanned for services by a starting VM as well - it means that such a directory can be used for both initial deployment (when the VM starts) as well as ongoing deployments (when the VM is already running).
Importing enmasse definitions
A starting VM can import enmasse definitions with objects that the server running in the VM should use.
In this manner, channels, connections and other server configuration elements can be recreated each time when a new VM is created.
In order for a VM to read in an enmasse file, it needs to be made available to the VM through a bind mount pointing to the VM's /tmp/enmasse.yml file, as in the example below.
Full example with multiple options
The example below is what a real-world boot-up script for a project could use to map multiple sources of data and configuration to a starting VM.
Note that, thanks to the usage of bind mounts, it is possible to map arbitrary files and directories to the VM, not only Zato-related ones. It means that a single script similar to the one below is everything that is needed to create new, reproducible environments for a project.
#!/bin/bash

# First, delete any previous environment ..
vagrant destroy --force && \

# .. and start a new VM now.
vagrant \
--vm-name=myvm \
--map-ssh-dir=true \
--ssh-password=abc \
--dashboard-password=abc \
--user-conf-dir=/path/to/config/user-conf \
--extlib-dir=/path/to/extlib/src \
--hot-deploy-dir=/path/to/services \
--enmasse-file=/path/to/config/enmasse.yml \
--pre-enmasse-script=/path/to/zato-pre-enmasse-script.sh \
--post-install-script=/path/to/zato-post-install-script.sh \
up --provision
In the example, observe that all the Zato-specific command-line options must come before the "up --provision", otherwise Vagrant will reject them as unrecognized.
Understanding bare-metal cloud deployments
Because Vagrant uses VirtualBox, which is a full hypervisor rather than a tool to build containers, it means that Vagrant can be used on Windows, Max or Linux but the host system needs to be a real one, a bare-metal one that offers access to VT-x or a compatible technology for other CPU types. It cannot be an already virtualized instance.
For instance, if you run Vagrant on your own laptop, regardless of your host OS, then Vagrant will work directly using your host system. However, in a cloud environment, make sure that an instance that you create for Vagrant is a bare-metal one specifically.
Command-line options
Vagrant-based environments use various command-line options to fine-tune the resulting installation.
In particular, it is through command-line options that passwords can be provided to ensure that each new VM uses the same secrets, e.g. in order for your IDE to connect to the server inside without a need to change the IDE connection's password each time a new VM is created.
Note that all the options must precede Vagrant's own built-in commands, like in the example below where "--ide-password" and "--dashboard-password" are provided before "up --provision" is given.
Passwords and credentials
| Option | Notes |
|---|---|
| --ssh-password | SSH password for user "zato" inside the VM. |
| --dashboard-password | Password for user "admin" when logging it to Zato Dashboard at http://localhost:8183 |
| --ide-password | Password for user "ide_publisher" when configuring an IDE for Zato hot-deployment. |
| --map-ssh-dir | Whether the ~/.ssh directory on host should be mapped to the "zato" user's ~/.ssh directory inside the VM. |
Enmasse
| Option | Notes |
|---|---|
| --enmasse-file | Path to an enmasse file on host to import object definitions from. It will be mapped to "/tmp/enmasse.yaml" in the VM. |
| --pre-enmasse-script | Path to a script on host that should execute right before enmasse runs. It will be mapped to "/tmp/zato-pre-enmasse-script.sh" in the VM. |
| --post-install-script | Path to a script on host that should execute right after the installation of Zato inside the VM completes. It will be mapped to "/tmp/zato-post-install-script.sh" in the VM. |
Hot-deployment and configuration
| Option | Notes |
|---|---|
| --python-reqs | Path to a requirements.txt file on host to install additional Python dependencies from. It will be mapped to "/tmp/zato-user-reqs/requirements.txt" in the VM. |
| --hot-deploy-dir | Path to a directory with Zato services to hot-deploy. It will be mapped to "/opt/hot-deploy/services" in the VM. |
| --user-conf-dir | A directory with .ini-style configuration files that, in runtime, will be available to Zato services via self.user_config. The directory will be mapped to "/tmp/zato-user-conf" in the VM. |
| --extlib-dir | A directory with Python code that should be placed on $PYTHONPATH inside the VM, e.g. when it is not possible to add extra libraries using pip or requirements.txt. The directory will be mapped to "/tmp/zato-extlib" in the VM. |
Misc
| Option | Notes |
|---|---|
| --vm-name | Name that the resulting VirtualBox VM should have. |