Configuring VS Code for Zato
Two ways to deploy on save - the blueprint mount for a local install, the plugin for a remote one.
This chapter describes how to deploy services to Zato on save from Visual Studio Code. Pick the tab that matches where your server runs - on the same machine as VS Code, or on a remote one.
Another chapter describes how to add code completion (IntelliSense) to the IDE.
With the Zato container running on the same machine as VS Code, the project blueprint is all that is needed.
Setup
Clone the blueprint and run its provisioning script,
myproject/impl/scripts/run-container.sh, which starts a new Zato environment with the project mounted into itIn VS Code, choose File -> Open Folder and open the clone - the Python extension is the only extension you need for editing
Deployment
- Open
myproject/impl/src/api/crm.py, change anything in it and save the file. A moment later the server log confirms the deployment:
- That is the whole workflow - save, wait a second, invoke. To deploy as you pause typing, set
files.autoSavetoafterDelayin your settings.
How it works
The provisioning script mounts the project into the container and points the server at it through the Zato_Project_Root variable - these two lines are the whole integration:
echo Zato_Project_Root=$target/$env_name  >> $host_root_dir/config/auto-generated/env.ini
--mount type=bind,source=$zato_project_root,target=$target/$env_name,readonly
The server watches the mounted directory, so saving a file on the host deploys it in the container. The hot deployment page explains the layout rules and what else is watched, and the deployment tutorial covers the blueprint from end to end.
When the server runs on another machine, the Zato plugin for Visual Studio Code, available from the Visual Studio marketplace, adds a default keybinding along with a toolbar button enabling simplified hot-deployment to your development environment over HTTP.
Prerequisites
To enable hot-deployment from Visual Studio Code, ensure you have first set the ide_publisher password that the plugin authenticates with.
Installation
Visit the Extensions Marketplace either in your browser, or within the application, by pressing Ctrl+Shift+X hot-key:

Configuration
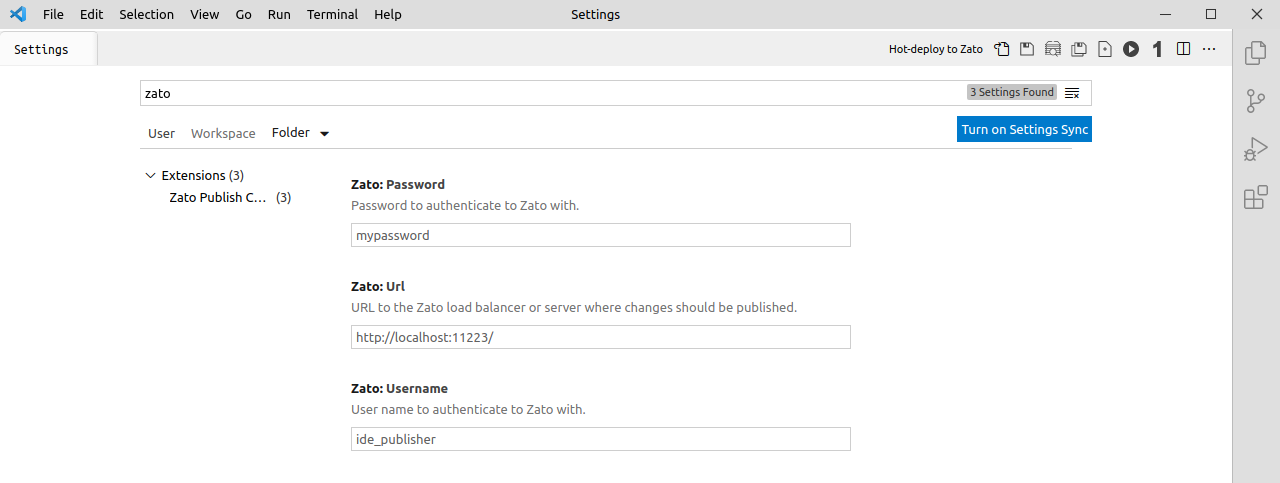
After the installation completes, visit the settings panel via Ctrl+, to configure your server connection. The address is the server's /ide-deploy channel on port 11223, http://<host>:11223/ide-deploy, and the username is ide_publisher:
Deployment
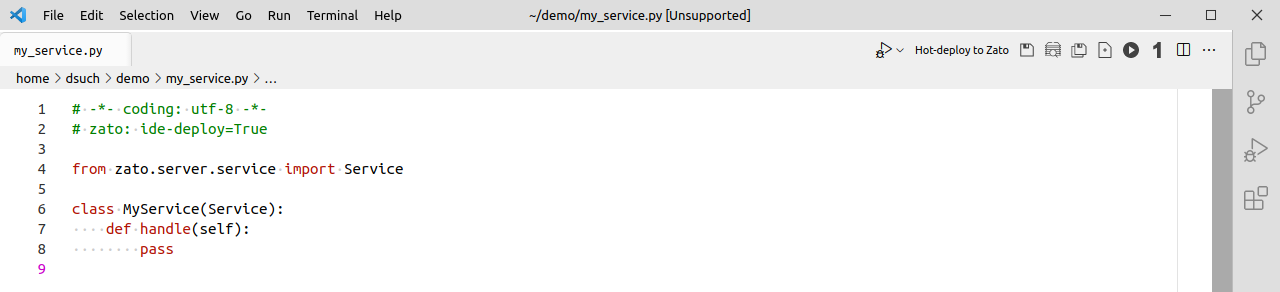
- Automatic deployment is triggered on every file save if a Python file contains a special deployment marker within its first 100 lines of source code:
# -*- coding: utf-8 -*-
# zato: ide-deploy=True

from zato.server.service import Service

class MyService(Service):
    def handle(self):
        pass
- While editing any Python module, you can also deploy to the configured Zato environment by clicking the toolbar icon, or pressing the
Ctrl+Shift+Lhotkey: