Download and install Docker Desktop for Windows
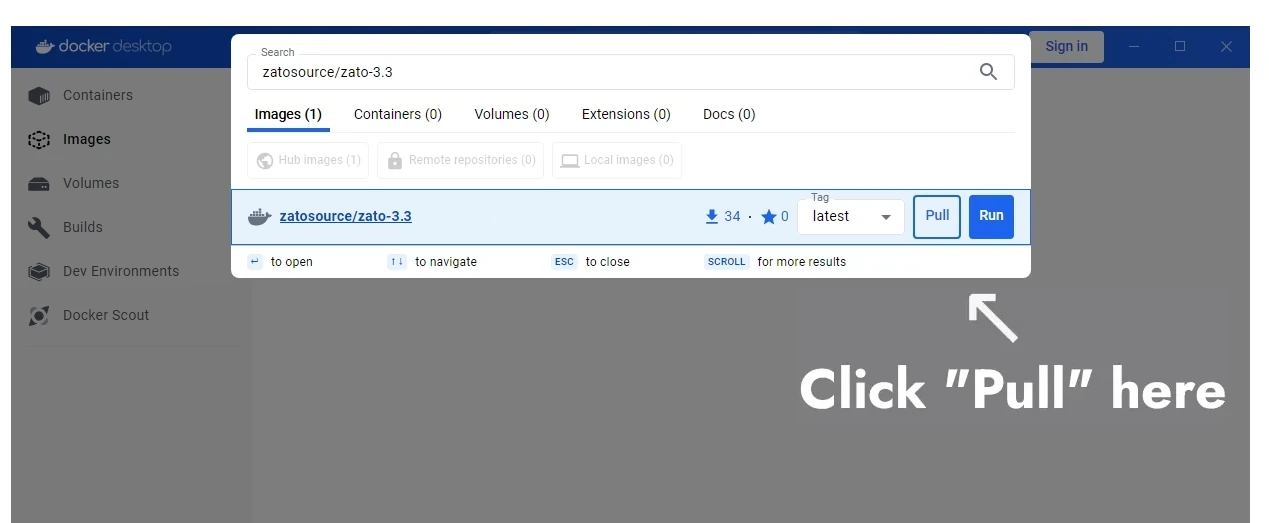
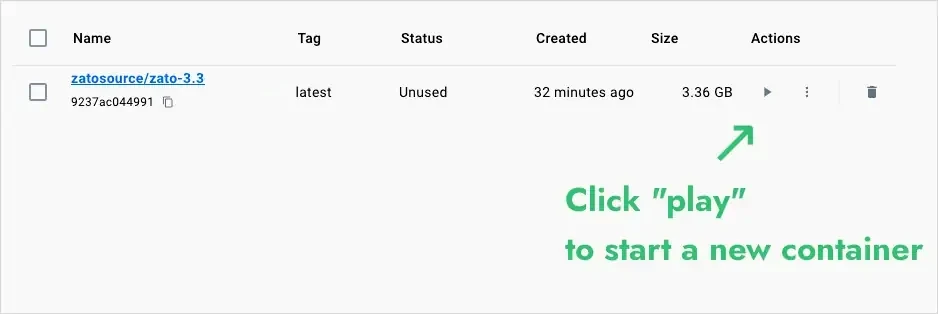
Start Docker Desktop, look up an image called zatosource/zato-4.1 and pull it to your system 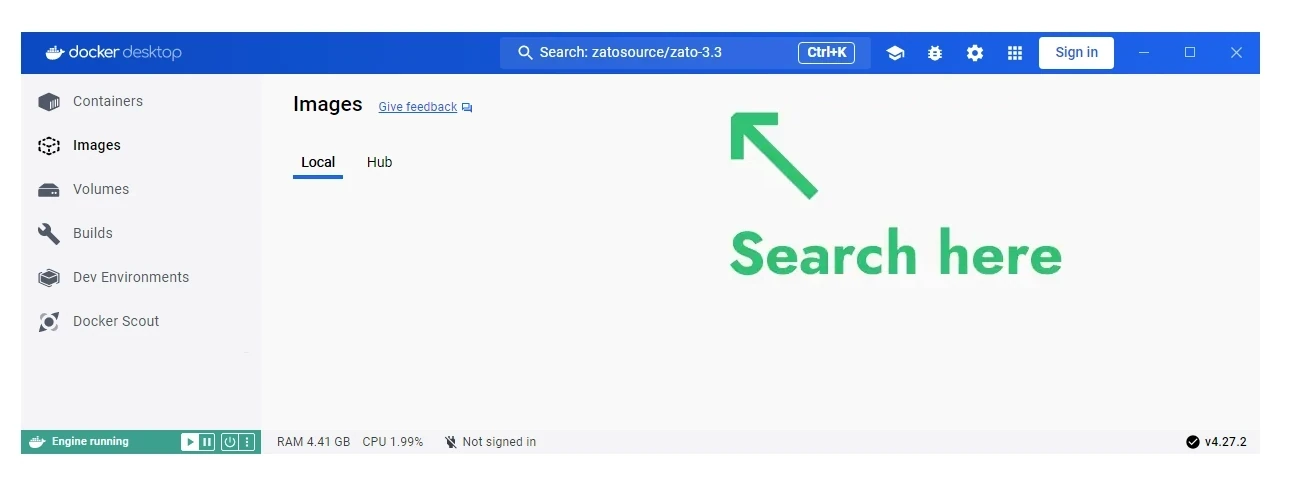
PS c:\Users\myuser>wsl --update
Checking for updates.
Updating Windows Subsystem for Linux to version: 2.x.yy.
...
PS C:\Windows\system32> wsl --install --web-download -d Ubuntu-24.04
Downloading: Ubuntu 24.04 LTS
...
sudo apt-get update && \
sudo apt-get upgrade -y && \
sudo apt-get install ca-certificates curl -y && \
sudo install -m 0755 -d /etc/apt/keyrings && \
sudo curl -fsSL https://download.docker.com/linux/ubuntu/gpg -o /etc/apt/keyrings/docker.asc && \
sudo chmod a+r /etc/apt/keyrings/docker.asc && \
echo \
  "deb [arch=$(dpkg --print-architecture) signed-by=/etc/apt/keyrings/docker.asc] https://download.docker.com/linux/ubuntu \
  $(. /etc/os-release && echo "${UBUNTU_CODENAME:-$VERSION_CODENAME}") stable" | \
sudo tee /etc/apt/sources.list.d/docker.list > /dev/null && \
sudo apt-get update &&
sudo apt-get install docker-ce docker-ce-cli containerd.io docker-buildx-plugin docker-compose-plugin -y &&
sudo usermod -aG docker $USER
Log out of WSL and log in to it again
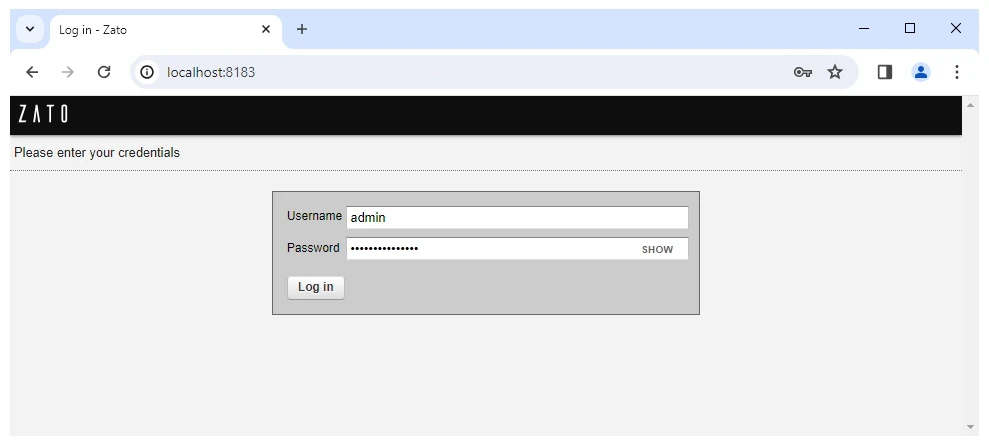
Clone the GitHub repository with a blueprint Zato project
Book a demo with an expert who will help you build meaningful systems that match your ambitions
"For me, Zato Source is the only technology partner to help with operational improvements."
 — John Adams
Program Manager of Channel Enablement at Keysight ![]()